In brief
- Where the brown sits — tip, edge, or scattered spots — is the first clue, and it narrows the check rather than naming a cause.
- The usual stack: inconsistent moisture, salt buildup, and dry air are far more common than disease on indoor plants.
- Check the potting mix below the surface before changing anything else.
- No symptom confirms a cause on its own — a photo shows the pattern, not the roots or the water history.
Brown at the tips or edges of leaves is one of the most common houseplant sights — and one of the most over-read, because several very different causes produce nearly identical marks. The honest approach is the one Piedmont Master Gardeners (opens in a new tab) and Clemson’s home and garden centre (opens in a new tab) both take: treat the pattern as a starting question, then check the usual suspects in order before changing anything. This guide walks that order — pattern, mix, salts, environment — and where a photo runs out.
Where the brown is tells you where to look
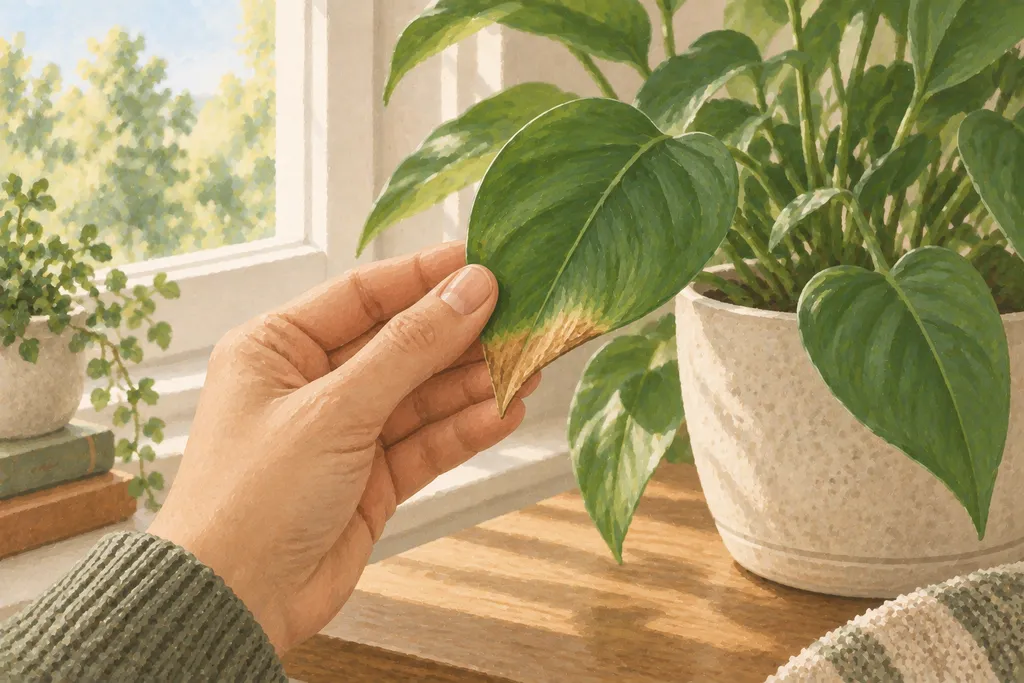
Start by describing what you actually see, because the map is the first clue. Brown confined to leaf tips often points toward the plant’s water economy — inconsistent moisture, salts reaching the furthest point of the leaf, or air dry enough to crisp the margin. Brown running along the leaf edges suggests scorch — dry air, heat, or a draft. Brown arriving as scattered spots across the leaf surface is a different pattern again, and one where feeding damage or a fungal leaf spot joins the list. And if the change you are describing is yellow rather than brown, the yellow-leaves guide reads that pattern instead.
None of these readings is a diagnosis — the same tip-browning appears in several cause lists. Clemson’s disorders factsheet (opens in a new tab) notes that most houseplant problems are environmental or cultural rather than diseases, which is why the checks below come before any product. Write down the pattern first: tips only, edges, or spots; which leaves; whether it is spreading.
The usual suspects: moisture swings, salts, dry air
Piedmont Master Gardeners put watering at the top of their brown-tip list — too much, too little, and the swing between the two all cause it — followed by humidity, light and temperature, salt buildup, and only then pests or disease. The order matters: the dramatic explanations (pests, disease) are the rarest causes on indoor plants, while the boring ones (a mix that swings between soggy and bone dry) explain most cases. Read their five-cause breakdown (opens in a new tab).
Dry indoor air deserves its own mention because it is invisible: most houseplants prefer relative humidity around 40–60%, while heated winter homes can fall to roughly 10%. A plant that develops crispy edges every January and recovers every summer is often telling you about the room, not the watering can. Clemson adds hot, dry air and improperly applied water to the same suspect list — the causes overlap, which is exactly why checking beats guessing.
One expectation worth setting early: browned tissue does not turn green again. The goal of every check in this guide is to stop new leaves from browning — the crisped tips you already have are a record, not a repair job. You can trim dead edges with clean scissors, following the leaf’s shape and leaving a hair of brown rather than cutting into living tissue, or simply leave them. Judge success by the next flush of growth, not by the old leaves improving.
Check the potting mix before anything else
Before changing anything, learn what the roots are actually sitting in. Push a finger into the mix about two inches deep — the depth Piedmont’s guide suggests — rather than judging by the surface, which dries first and lies. A mix that is still damp down there while the leaves crisp tells a different story from one that is dusty all the way through. Lifting the pot helps too: a dry pot weighs noticeably less than a wet one.
While you are there, check the drainage. Tip the pot and look for open holes, and empty any saucer or cache pot holding water — sitting in runoff is one of the most reliable ways to stress roots. If the plant lives in a decorative pot inside another pot, check the gap between them; hidden standing water fools careful waterers. The watering guide covers how to read the mix on a routine basis.
White crust and other salt clues
Look at the pot rim and the surface of the mix. A white to grey crust — on the clay, on the soil line, sometimes dusting the surface — is accumulated salt and mineral residue, and both Clemson and Piedmont flag it as a classic brown-tip cause. Fertiliser is itself a salt, so generous feeding builds the same crust; softened tap water and very hard water leave it too. Some plants are also sensitive to fluoride or chlorine in tap water, producing tip burn that mimics the same look.
The response is unglamorous but real: water thoroughly so excess actually runs through and drains away rather than evaporating in place, scrape crust off the mix surface, and do not reach for fertiliser to fix a plant that may be suffering from too much of it. If the crust is heavy, repotting into fresh mix resets the clock. Follow fertiliser labels when you do feed — more is not kinder.
When brown tips follow a repot or a move
Timeline beats pattern when the two disagree. Brown tips appearing within weeks of a repot, a move to a new room, the heating season starting, or a holiday trip are telling you something recent changed — disturbed roots, different light, drier air, or a skipped-and-then-doubled watering cycle. WSU Extension’s houseplants chapter (opens in a new tab) treats environmental fit as the core of indoor plant health for the same reason: conditions, not mysterious disease, drive most visible decline.
So note the start date against the last change you made. “Two weeks after moving beside the radiator” is a diagnosis-shaped observation; “sometime this winter” is not. If the timing is clear, the remedy is usually to undo or soften that one change — not to add three new ones on top of it. A repotted plant gets extra patience: disturbed roots temporarily drink less, so the same watering that suited the old pot can sit too wet in the new one. Give a recently repotted plant a few weeks to settle before deciding the browning means something else.
What a photo can’t rule out
A photograph shows the pattern beautifully and the cause not at all. It cannot read the moisture at root depth, see salt concentration in the mix, measure the room’s humidity, or rule out the early stages of something that needs a lens or a lab. That is why this guide keeps handing the work back to your own checks — the pattern in the photo plus what you can feel and measure is worth far more than either alone.
Know when the question outgrows the checklist: a plant declining fast, a collection you cannot afford to lose, spots that spread despite a clean bill on the usual suspects, or any plant whose brown leaves a pet or child might chew — those deserve a local extension service or plant professional. For everything else, describe the pattern and a short timeline and let the plant doctor suggest the checks in context — a starting point, not a diagnosis.
Takeaway: Describe the pattern, check the mix first, look for salt and recent change, then change one thing and watch. Brown tips are a question, not an answer.
Sources and further reading
- Piedmont Master Gardeners (Virginia Cooperative Extension program), Houseplants With Brown Leaf Tips (opens in a new tab)
- Clemson Cooperative Extension HGIC, Houseplant Diseases & Disorders (opens in a new tab)
- Washington State University Extension, PNW Gardener’s Handbook, chapter 14: Houseplants (opens in a new tab)
Sources last checked 2026-09-29. No pattern in this guide confirms a cause; rapid decline, valuable plants, or pet and child exposure are reasons to consult a professional.
Spotted an error? Tell us — include the page URL and what looks wrong.